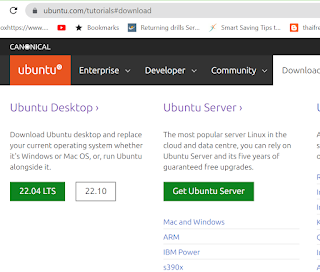
How to create bootable Ubuntu server using Rufus

 if you want to install Ubuntu OS on the computer I would like to give a simple how to as following.

Have PC for install the software. 

Have Ubuntu sofeware download from https://ubuntu.com/download/server

Have USB or DVD image based physical install

Check you PC requirement 

make sure you have at least 2GB of free storage space.
DVD or a USB flash drive containing the version of Ubuntu Server you want to install.


about the Rufus in brief: Rufus is a utility that helps format and create bootable USB flash drives, such as USB keys/pendrives, memory sticks, etc.

install Rufus and have USB pendrive connect to your USB port and browse for Ubuntu Server File download on your Local disk.

When finish the bootable process.

On your PC connect the USB pendrive to the USB port and reboot the PC.


Normally computers will automatically boot from USB or DVD, however, If you don’t see the boot message and the “Welcome” screen which should appear after it, you will need to set your computer to boot from the install media.

There should be an on-screen message when the computer starts telling you what key to press for settings or a boot menu. Depending on the manufacturer, this could be Escape, F2,F10 or F12. Simply restart your computer and hold down this key until the boot menu appears, then select the drive with the Ubuntu install media.

Choose your language.
Choose the correct keyboard layout
Choose your install   >>> Install Ubuntu 
Networking >>> would be Auto just click next 
Configure storage
The next step is to configure storage. The recommended install is to have an entire disk or partition set aside for running Ubuntu.
Select a device >> if you PC have more than one disk ,but if not this will be default.
Confirm partitionsc>> this process is to make sure your disk or partition to install.
Confirm changes>> This final confirm before installation begin so make sure your review and take note on the notebook for later reference.
Set up a Profile >>> This would be PC name and password make sure to write down on paper for later login and learn the process
What next ?
Ubuntu Server now installs a concise set of useful software required for servers.
If you are new to Ubuntu Server, go to Server Guide.

The difference between linux OS and linux Server

 I have did a reserach from the internet and make a sum as below.

Say linux OS is a software like windows .There are several different kinds of Linux, like CentOS, Debian, Ubuntu, and so forth. They all use the same base (the Linux kernel)

Whereas linux server is refer to the hardware (Computer case with mainboard and CPU inside) by

using one of these Linux operating systems.


Most Hits Q&A if desktop PC can run linux server ? Yes ,it can run,but for the learning and testing purposes ,if you want to serve the real work on the company then try to invest on the specific server will be a solution in a long term and pracicaly.


what is apacher?Apache is a piece of software available for most Linux operating systems (like you could install, say, Photoshop as a piece of software for Windows). Apache is what's called a web server. It resides on the physical server.


cross duty and function :

Apache is a webserver mainly developed to run on Unix/Linux type systems.

The difference between a server is that it's designed to serve something, hints the word (Serve). Basically not a desktop, but a desktop can play the roll as a server.

What is Ubuntu Desktop?

OS that can install on PC both desktop PC ,Laptop ,Server.
The Files and directories can be navigated by utilizing the file manager.
Ubuntu Desktop : having a Graphical User Interface (GUI), this Linux distribution relies on its command line known as “terminal.” The majority of commands that utilized the terminal for its execution can now use GUI as well.

What is Ubuntu Server?

The Ubuntu Server provides a whole operating system to use. It works with a command-line interface (CLI) rather than with GUI.  

Trend : New users who just switch from window OS some of them start to learn Ubuntu desktop for a simple and familiar with GUI similar to the window OS.


How to download and install virtualbox on Windows10

 If you want to install another operating system on PC in order to install or exprimental some software or script editor why not try this tools Virtual box.

What is virtual box is a software for insatll on computer and will allow you to install other OS or application base on its support platform.

How to install virtual box (VirtualBox runs on Windows, Linux, macOS)

1.go to https://www.virtualbox.org/

click download and install on your PC

then open the virtualbox 

-----------------------------


go to free and open source OS Ubuntu.com 

and dowload desktop Ubuntu 

https://ubuntu.com/download/desktop

-----------------------------------


after download finish 

go back to the virtual box click new

Enter the name for your new OS

Type : choose Linux 

Version : base on the Ubuntu we have just downloaded 

Next : Allocate the memmory for the new OS base on your machine specification Ram

-------------- Harddisk 

choose create the virtual HDD now.

Next : HDD file type

Select VDI Virtual Disk image

Next : Storage on Physical Hard disk 

Choose dinamically allocate 

--------------------- Next ...................

file location and type : Browse for the Ubuntu dowloaded on PC

type the name of the new virtual disk and select the size of disk.

back to the virtualbox window and choose new OS on the main panel.

----------------------- next ................

on the second tab :System where you can see the detail and the option of setting up new OS.

on the storage tab click on IDE second master and click the disk icon  :  choose virtual optical file and browse for the Ubuntu dowloaded the prior steps.

click : Start 

next windows will see try Ubuntu and install Ubuntu just choose install Ubuntu.

choose: erase disk and install Ubuntu

and click install now ! to begin the installation 

choose location 

choose keyboard layout 

fill up the text box for personal information and enter password for security as well.

this process will take time and sit back for some rest and finish the install Ubuntu.


restart to begin the learning process. 

like you can try on Libreoffice free office open source for instance.


How to make bar chart simple and more interesting

Sort data in orderly such as Jan Feb Mar… or Q1 Q2 Q3 Q4 

always begin y axis with 0 


use monotone color rather than multicolor this will help reader more understand easily ,however if you want to emphasize on the single bar chart then possible to hilight on that bar.


How to install Visual Studio Code

If you want to learn computer language I would like to inform about 2 or 3 computer languages coding form like HTML ,Pyton and JS.

there are a couples of windows coding software availble on the internet to download and install ,for this article I would like to suggest the VSC or Visual Studio coding.

with this VSC is a bundle of tools and learning sources from html ,Js and pyton and etc.

Vsc is free tools to download and instll on windows and I pasted the link below for download and install.

Visual Studio Code


A standalone source code editor that runs on Windows, macOS, and Linux. The top pick for Java and web developers, with tons of extensions to support just about any programming language.


VSC can install on windows , Mac and linux 
I suggest you to create the folder in VSC in order to start to learn how to use VSC
and then create the file nane as app.js 
var msg = 'Hello World';
console.log(msg);

How to run the code with in VSC 
download and install node.js before starting to run the code


How to run the first js script using the terminal within the VSC 
go to view menu and terminal
type node app.js 
you would see the msg Hello world


How to install WSL on windows

 For this tutorial I am going to walk you through the step by step on how to install ubuntu linux desktop on windows PC.

if you keen on learning about installing linux operating system for having fun experience or for work ,then this article will show you how to do that.

what you need.

PC with windows10 or 11 

step 1 install Windows Subsystem for Linux (WSL)

there are two ways to install 

installed from the command line  
wsl --install

and from the Microsoft Store


Go to Microsoft Store and search keyword for Windows subsystem  and Click on Get to download and install the application.


Next 
download ubuntu from Microsoft Store 

There are three types of Ubuntu releases published to the Microsoft Store:
Ubuntu 20.04.x. This will always be 20.04 and upgrades won’t be proposed.


Ubuntu without a version number. This is the latest LTS version of Ubuntu after the first point release. At the time of writing, it is Ubuntu 22.04. It will remain Ubuntu 22.04 until the first point release of the next LTS release of Ubuntu, for example 24.04.1 in 2024.
Ubuntu Preview is a daily build of the latest development version of Ubuntu. You should install it if you want to live on the edge but not for production workload as it doesn’t receive the same amount of QA as stable releases and may break at any time.

for this tutorial I am going to choose Ubuntu without a version number.

สร้างระบบอัพโหลดไฟล์ PHP - File Uploading

 สำหรับบทความรู้ในวันนี้ admin ขอนำมาฝากคนที่สนใจศึกษาการเขียนโปรแกรม PHP ในการใช้งาน กับหน่วยงาน หรือองค์กร หรือโปรเจคส่งอาจารย์ 

ชุดคำสั่งการทำงานของภาษา PHP จะเรียกว่า PHP script โดยจะแทรกในคำสั่งภาษา HTML เพื่อให้ผู้ใช้งานสามารถอัพโหลดไฟล์ ขึ้นไปเก็บที่เครื่องบริการแม่ข่าย Server โดยไฟล์จะถูกเก็บไว้ที่แฟ้มชั่วคราว แล้วค่อยย้ายไปที่เก็บถาวรอีกภายหลังด้วยชุดคำสั่ง PHP 

ไฟล์ phpinfo.php จะอธิบายถึงโฟลเดอร์ชั่วคราว ที่จะใช้ในการพักไฟล์ที่อัพมาขั้นแรก upload_tem_dir และขนาดไฟล์มากสุดที่อนุญาตให้อัพได้  ด้วยคำสั่ง upload_max_filesize  ซึ่งค่ากำหนดเหล่านี่จะต้องระบุในไฟล์ php.ini 

กระบวนการทำงาน 

เริ่มจากผู้ใช้งานเปิดเพจ HTML ฟอร์มอัพโหลดไฟล์ มีกล่องข้อความ มีปุ่ม browse เข้าไปเลือกไฟล์ในเครื่อง และปุ่ม อัพโหลด 

  • ผู้ใช้งานคลิก browse เข้าไปเลือกไฟล์ในเครื่องที่ต้องการอัพโหลด เช่น .doc ,.pdf เป็นต้น 

  • เส้นทางไปยังไฟล์ที่อัพโหลดจะแสดงขึ้นมาในช่องข้อความ และคลิกปุ่ม อัพโหลด 

  • ไฟล์จะถูกส่งไปยังโฟลเดอร์ชั่วคราวบนแม่ข่าย 

  • คำสั่งการทำงานภาษา PHP Script จะเริ่มทำงาน ตามที่กำหนดในแบบฟอร์ม action และตรวจสอบการอัพไฟล์ และบันทึกลงแม่ข่ายเรียบร้อย และแสดงข้อความยืนยันการส่งไฟล์ สำเร็จ 

  • สำหรับผู้พัฒนางาน ต้องอนุญาตสิทธิการเขียนไฟล์ write ในโฟลเดอร์ชั่วคราว หรือถาวร ไม่แล้วจะทำงานไม่ได้ 

สร้างแบบฟอร์มอัพโหลดไฟล์ 

ตัวอย่างหน้า HTML สร้างหน้าอัพโหลดไฟล์ตัวอย่าง ซึ่งจะใช้วิธี Post และกำหนคำสั่งการควบคุมการทำงานด้วยชุดคำสั่งแบบ enctype (คำสั่งสำหรับเข้ารหัสไฟล์ เพื่อทำให้ไฟล์สามารถส่งผ่านฟอร์มแบบ POST ได้ 2. enctype="multipart/form-data" จะกำหนดไว้ที่แท็ก form ของ HTML และใช้งานร่วมกับ input submit.) 

ตัวอย่าง ฟอร์ม HTML

<?php
   if(isset($_FILES['image'])){
      $errors= array();
      $file_name = $_FILES['image']['name'];
      $file_size =$_FILES['image']['size'];
      $file_tmp =$_FILES['image']['tmp_name'];
      $file_type=$_FILES['image']['type'];
      $file_ext=strtolower(end(explode('.',$_FILES['image']['name'])));
      
      $extensions= array("jpeg","jpg","png");
      
      if(in_array($file_ext,$extensions)=== false){
         $errors[]="extension not allowed, please choose a JPEG or PNG file.";
      }
      
      if($file_size > 2097152){
         $errors[]='File size must be excately 2 MB';
      }
      
      if(empty($errors)==true){
         move_uploaded_file($file_tmp,"images/".$file_name);
         echo "Success";
      }else{
         print_r($errors);
      }
   }
?>
<html>
   <body>
      
      <form action="" method="POST" enctype="multipart/form-data">
         <input type="file" name="image" />
         <input type="submit"/>
      </form>
      
   </body>
</html>

เขียน script ภาษา PHP 

ค่าตัวแปรชนิด global เรียนว่า  $_FILES. ซึ่งจะสร้างตัวแปรที่เกี่ยวข้องในการอัพไฟล์ จำนวน 5 ตัวแปรด้วยกัน คือ 
  • $_FILES['file']['tmp_name'] −ไฟล์ที่อัพไปที่แฟ้มชั่วคราวของแม่ข่าย 

  • $_FILES['file']['name'] − ชื่อของไฟล์ที่ถูกอัพโหลด 

  • $_FILES['file']['size'] − ขนาดของไฟล์

  • $_FILES['file']['type'] −ตัวแปรระบุชนิดของไฟล์ 

  • $_FILES['file']['error'] − ค่าความผิดพลาดการทำงาน 


ตัวอย่าง script ในการอัพโหลดไฟล์ 

<?php
   if(isset($_FILES['image'])){
      $errors= array();
      $file_name = $_FILES['image']['name'];
      $file_size = $_FILES['image']['size'];
      $file_tmp = $_FILES['image']['tmp_name'];
      $file_type = $_FILES['image']['type'];
      $file_ext=strtolower(end(explode('.',$_FILES['image']['name'])));
      
      $extensions= array("jpeg","jpg","png");
      
      if(in_array($file_ext,$extensions)=== false){
         $errors[]="extension not allowed, please choose a JPEG or PNG file.";
      }
      
      if($file_size > 2097152) {
         $errors[]='File size must be excately 2 MB';
      }
      
      if(empty($errors)==true) {
         move_uploaded_file($file_tmp,"images/".$file_name);
         echo "Success";
      }else{
         print_r($errors);
      }
   }
?>
<html>
   <body>
      
      <form action = "" method = "POST" enctype = "multipart/form-data">
         <input type = "file" name = "image" />
         <input type = "submit"/>
			
         <ul>
            <li>Sent file: <?php echo $_FILES['image']['name'];  ?>
            <li>File size: <?php echo $_FILES['image']['size'];  ?>
            <li>File type: <?php echo $_FILES['image']['type'] ?>
         </ul>
			
      </form>
      
   </body>
</html>
แนะนำให้ลองนำไปใช้งานกับ server จำลอง เพื่อทดสอบการทำงาน และแก้ไขเพิ่มเติมตามสภาพแวดล้อมการทำงาน ใช้งานของแต่ละองค์กร หรือ หน่วยงาน 


source: https://www.tutorialspoint.com/php/php_coding_standard.htm

Make computer and printer inventory appsheet EP1

 Step 1 desing your table as below

Main table what data your want to keep in this tutorial I am going to make this 

Id

items

sorial no

brand 

model

image

date of receiving

doc

item location

item qrcode

status

------------  

create 2 ref.tables for the item location and the items

for the items

id

items list

for the item location

id

location name

-------------------------

now go to the appsheet 

create the new app

name the app as computer app

and import all the table into the app 

for each table go to the column view and select the column type that relate to the data we want to store.

-----------------------------------------

That all for the 1st ep.

Next ep.2 will be about how to make a dropdown menu for the column items and the items location by using the Valid_if function 

and a step of UX view ,form view and input some data in order to show how to app.

this step will cover how to link to google qrcode service which later we can print out and stick to the computer case for scanning purpose.


How to Make a DropDown Menu Using Valid_If | AppSheet

What is a dropdown menu ? the pre-list which admin can control the data input as he or she want to.

for user who fill the form with simple and fast action.

I would like new learnners supposed to learn how to make a prelist by using Enum first,then try using valid_if 

 First go to Google sheet and create data table for your source database file.

column                        datatype

Id                                 key unique

Items name                 text 

Item serialno             text 

Items type                text using valid_if 

Items Date                date

Item image               image

Item budget             enum 

Item workstation        text  using valid_if 

Item doc                file

----------------------------------

make another table call items type 

column             data type

id                         unique

items name          text 

then fill up the table with your data as below for example.


 when go to appsheet and connect to the table 


column view specific the table and column 

in the valid_if box 

type : table name [column name]

the good thing about using the valid dropdown is that you can make many apps by using the same reference source table.

on the view app 

go to the form and click on the column to test the dropdown menu.


-----------------

how to manually enter the options for the column dropdown list 

on the valid if condition type {"option1","option2","option3"}

-------------------- 

another ways of the dropdown menu is by using the select function 

you have to add another column to the table 

then on the valid if condition type : select(Table name[Column Name List],[constraint column name]="TRUE"

so in sum up how to create the dropdown menu in appsheet app.

you got 3 options to do so.

  1. valid_if condition by reference from another table source 
  2. manually enter the options in the valid_if condition
  3. Select function for some constraint value.


How to video

How to set up microphone boots on Windows10

 Microphone Boost is a Windows built-in setting that can be used to increase the volume while using some voice-over-IP services like Discord and Skype

when you are on VTC calling for teaching or presentation like Zoom ,Meet and webex for example 

make sure that the audio is function properly ,however if got the low audio and voice here are the hits

try to talk close to the mic and speak up

go to the microphone boots on Windows10 and increas the boots level 

how to access the microphone boots on Windows10

right click on the speaker icon 

then open sound setting

click device property and choose addition device property 


click tab level 


move slide bar from left to right to increase the audio level


วิธีการตรวจสอบเวอร์ชั่น DirectX ของวินโดว์ 10

 บนหน้าจอคอมพิวเตอร์ ไปที่บริเวณมุมล่างซ้าย ในช่องค้นหา พิมพ์คำว่า dxdiag ลงไปแล้วกด Enter

จะมีกล่องโต้ตอบขึ้นมา เพื่อให้เรายืนยันการเรียกดูข้อมูลระบบของวินโดว์ 10 ให้เรากดปุ่มยืนยัน 

ในหน้าต่างถัดมา จะแสดงข้อมูลที่เกี่ยวข้องกับระบบข้อมูลของเครื่องวินโดว์ 10 ดังนี้

ระบบรวมหรือ system จะแสดงข้อมูลควบคุมการทำงานของคอมพิวเตอร์ที่สำคัญ รายการ Hardwares/Software ที่สำคัญของระบบได้แก่ ยี่ห้อรุ่นและความเร็วของ CPU ,Ram , ระบบปฏิบัติการ OS เป็นต้น 

การดูข้อมูล Hardwares อื่นๆ ได้แก่ ระบบเสียง และระบบจอภาพแสดงผล 

ข้อมูลที่ได้สามารถใช้เป็นข้อมูลขั้นต้น ในการแจ้งข้อมูลรุ่น หรือยี่ห้อ ให้ฝ่ายช่าง หรือนำไปสืบค้นหาไดรืฟเวอร์อุปกรณ์ในอินเตอร์เน็ตต่อไปได้ 

A step of how to run the windows10 DirectX test

A quite simple first step is type dxdiag in the search box and hit Enter keyboard

the warning pop up will be shown and ask if we want to go on the process ,so just hit the OK button and go on

This will bring the system information sum for us 

so what data we can get 

hardware and software information such as CPU ,RAM ,Sound and VGA 

in sum up : the build in tiny tool on windows10 for users to check for some hardware and software specification in order to look for more detail on the other purposes.


ตัวอย่างการใช้งานนิพจน์กับคอลัมน์ Appsheet

การเขียนแอพด้วยแอพชีพนั้น สามารถเขียนนิพจน์หรือเงื่อนไขทางคณิตศาสตร์เพื่อแสดงผลข้อมูลในคอลัมน์และค่าของแถวตารางที่ต้องการนำมาแสดงผลได้
สมการนิพจน์ที่เขียนจะคืนค่าตามที่ระบุในคอลัมน์ โดยที่แถว row ไม่ต้องกำหนด ปกติจะชัดเจนและคลอบคลุมในนิพจน์ของคอลัมน์


เริ่มจากวงเล็บแบบจัตุรัส : [ชื่อคอลัมน์].ถ้าใช้ในคอลัมน์จำกัด (Editable_If, Required_If, Show_If, or Valid_If), สามารถใช้ [_THIS] เพื่ออ้างถึงค่าของคอลัมน์ปัจจุบัน
ถ้าแถวปัจจุบัน row ไม่ได้อ้างถึงในนิพจน์, จำเป็นต้องมีการระบุโดยใช้นิพจน์ชนิด dereference

ตัวอย่างนิพจน์ที่พบบ่อย

ผู้พัฒนาแอพชีพ สามารถสร้างตาราง sheet และลิงค์ด้วย Appsheet เพื่อศึกษาการใช้งานนิพจน์ทางคณิตศาสตร์ กับคอลัมน์ของตาราง ได้
สร้างคอลัมน์จำลองขึ้นมา เพื่อรวมผลชื่อและนามสกุลเข้าด้วยกันIn a virtual column: CONCATENATE([FirstName], " ", [LastName])
In a slice filter condition: [Status] = "Complete"
สร้างเงื่อนไขในการกรองข้อมูลในคอลัม์ แถบสถานะ = "เสร็จสมบูรณ์"


In a Valid_If column constraint: [_THIS] > 25


ในช่องจำกัดเงื่อนไข [_THIS]>25


แสดงข้อมูลที่มากกว่า 25 ขึ้นไป


ตัวอย่างแอพ ที่นำชื่อและนามสกุลคนละคอลัมน์มารวมกัน และแสดงผลในแถวเดียวกัน 
สูตรที่ใช้งานคือ CONCATENATE([ชื่อ]," ",[นามสกุล])

อีกตัวอย่างการใช้งานในการกรองข้อมูลอายุของข้อมูล 
[_THIS]>15
ให้แสดงอายุของนักเรียนที่มีอายุมากกว่า 15 ปี 


ชมตัวอย่างการใช้งาน การสร้างนิพจน์ควบคุมการแสดงผลคอลัมน์ ที่เราต้องการ ด้วยการรวมชื่อ และนามสกุล เข้าเป็นข้อมูลในแถวเดียวกัน