if we have have already Nero7 installed on your computer and we want to make a CD audio for listening in our car or portable music player,then we can make it by follow this easy steps guide.
Click on the icon Audio in Nero StartSmart.
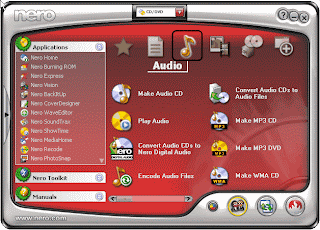 Click on Make Audio CD in Nero StartSmart.
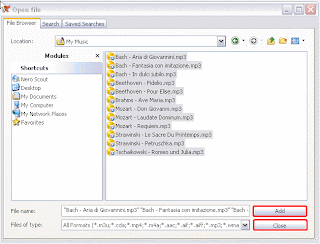
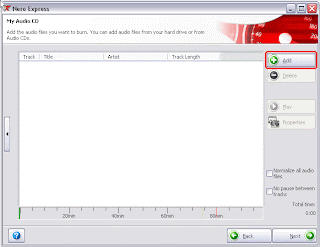 Browse for the audio files you want to use and highlight them before you click the Add button.
 Click the Close button if all audio files have been added to the compilation.
The following formats are supported:
mp3, mp3PRO, WAV, WMA, AIF and Nero Digital Audio formats such as AAC, MP4
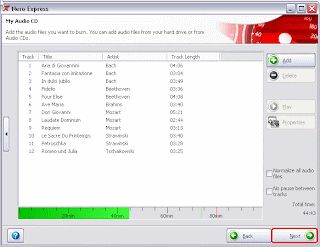
 Click the Next button to continue.
 ou can create a crossfade between two audio tracks. The new track starts playing quietly while the current track is still playing.
 The current track will melt into the new track without a break.
Highlight the tracks you want to crossfade.
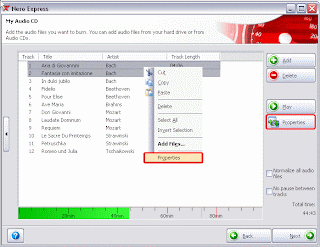 Make a rightclick and select Properties in the context menu or click the Properties button.
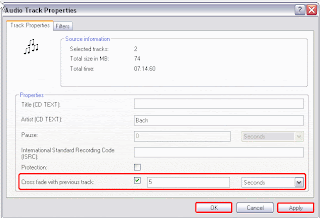 Check the box Cross fade with previous track and specify the seconds for the fade.
Confirm this setting with Apply and OK.
Select the final burn settings.
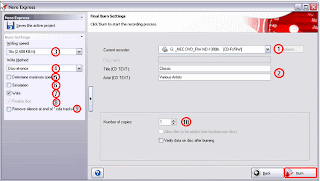 (1) Current recorder
Select the recorder you want to use
(2) Insert Title & Artist information
(3) Select the Writing speed
(4) Write Method
Select either 'Disc-at-once' or 'Track-at-once'.
Disc-at-once: the entire CD/DVD is written in one go without deactivating the laser.
Track-at-once: every track is written individually and the laser is turned off after every track.
Always use 'Disc-at-once' whenever burning an Audio CD.
If you wish to write CD-TEXT or perform overburning you must select 'Disc-at-once'.
(
(5) Determine maximum speed
A speed test is performed before recording.
Nero will determine the safest maximum speed for burning your disc.
(6) Simulation
A simulation burn will be performed to check if the disc is ready.
No data is actually written on the disc.
(7) Write
Starts the actual physical burning process.
(8) Finalize disc
This box is checked by default for all audio CD compilations.
No further audio tracks can be added to a burned audio CD.
(
(9) Remove silence at end of *.cda tracks
Audio files are stored in frames, but might not end exactly at the end of a frame. The result is that this frame is filled with silence.
This option removes the silence.
(10) Select the Number of copies
Click the Burn button to start the burning process.
Nero will open the following window if it does not detect a blank CD-R or CD-RW medium in the recorder drive.
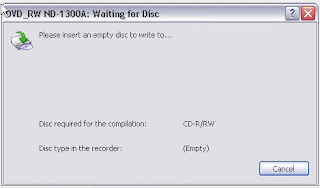 nsert a blank disc. Nero will detect the disc and will start the burning process automatically. ( Do not click the Cancel button !)
Follow the status of the burning process in this window:


ไม่มีความคิดเห็น:
แสดงความคิดเห็น